Do you constantly hear footsteps and talking above your head? If you live in any multi-story home or apartment building, you’re probably no stranger to being bothered by noise from the floor above. Soundproofing a floor actually isn’t too complex as long as you have the right materials. It also help to have access to the floor that needs soundproofing.
Unfortunately, if you live in an apartment and don’t know your upstairs neighbor, there’s not much you can do to soundproof their floor above. If you live in a multi-story home or condo, there is something you can do to solve your sound issue.
Below, we’ll tell you how to soundproof a floor by installing a soundproofing floor underlayment, and we’ll even let you know which underlayments are the best for different flooring types – mass loaded vinyl or crumbled rubber.
But first – how do sound underlayments even work? Sound underlayments act as a separating layer between the subfloor and the finish floor, to keep sound from traveling through to the floor below. Sound actually travels faster through more solid surfaces, so the underlayment works as sort of a shock absorber and a sound barrier to stop both footfall noise and voices from traveling through the floor.
How to Soundproof a Floor Using a Floor Underlayment
When starting to soundproof a floor you have two options, you can either:
- Remove the existing finish floor, exposing the subfloor (recommended)
- Keep the finish floor in place
When using a sound underlayment it is ideal to install it directly on the subfloor and to add your new finish floor on top of that. However, if removing the finish floor and replacing it is outside of your budget or time constraints, you can install sound mats on top of existing finish floor, as long as you add another layer of flooring on top of the sound mat.
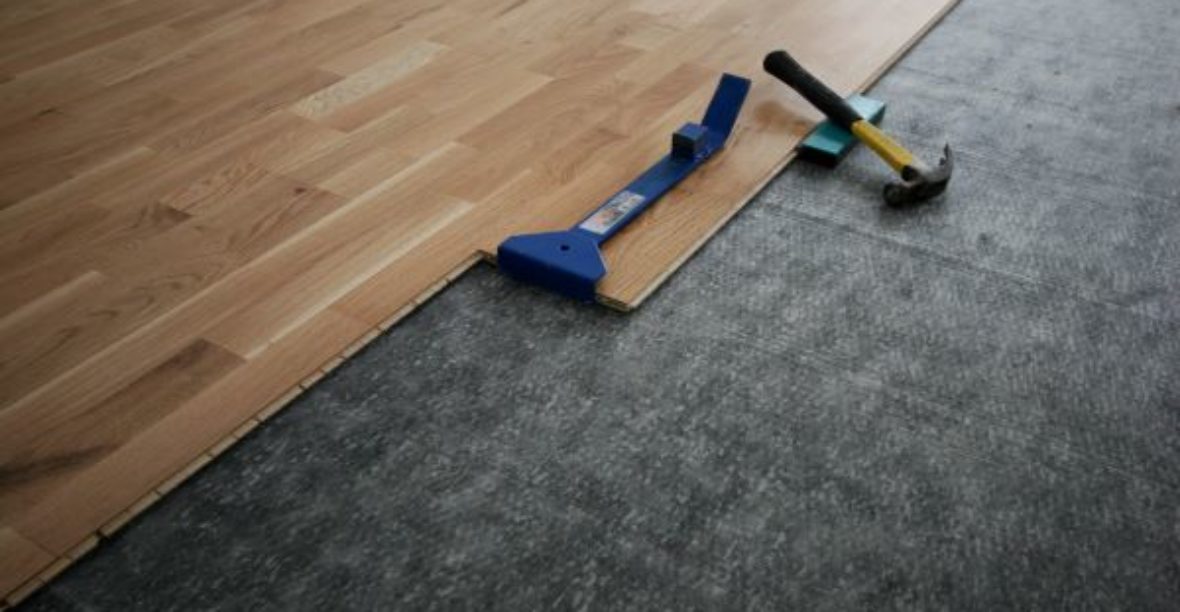
How to Install Mass Loaded Vinyl Based Underlayment on Floor
One type of sound underlayment, known as Floor Blokker, is a layer of Mass Loaded Vinyl with a polyester scrim attached to it. This 1 lb/sf, 1/4″ thick underlayment can be installed under hardwood, carpet, laminate, or LVP/LVT over 5mm thick.
Installation Instructions:
- Place Floor Blokker with the MLV layer side in accordance with the flooring used
- Floating Floors: MLV side down
- Glue Down LVT or Glue Down Hardwood: MLV side up
- Carpet Flooring: MLV side up
- Place edge to edge each piece of Floor Blokker to complete the coverage of the room being treated
- Add desired flooring on top of the Floor Blokker as per recommended installation techniques
- Laminate floors can be floated directly on top
- Wood floors can be nailed directly on top
- Carpet layers can go directly on top
With its combined layers of mass loaded vinyl and a polyester scrim, Floor Blokker is able to soundproof against airborne noise such as voices and music, and cushion the impact of structure borne footfall noise.
NOTE: Not designed for use under ceramic or porcelain tile. Recommended use of LVT 5mm or thicker.
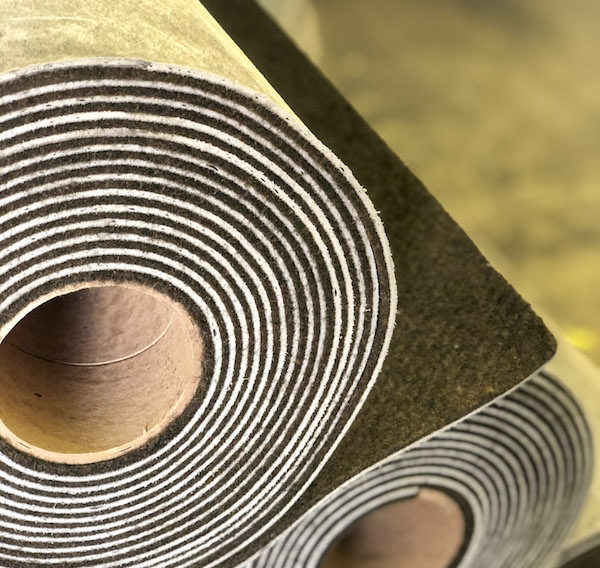
How to Install Rubber Sound Mat to Increase Floor IIC
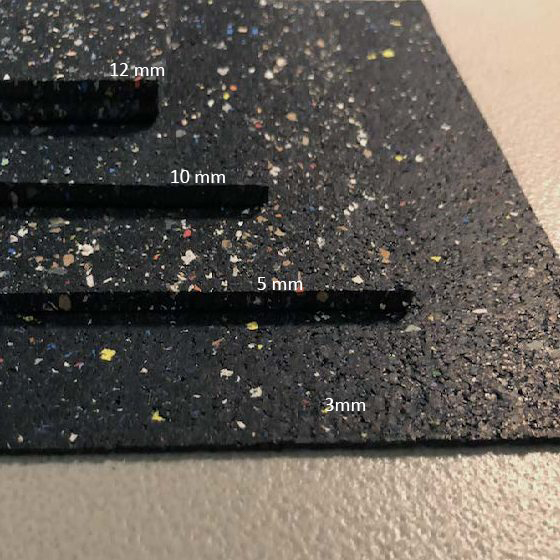
Another popular type of sound mat is a crumbled rubber sound mat, also known as AcoustiStep. Depending on the level of floor soundproofing you need, AcoustiStep comes in multiple thicknesses – 2mm, 3mm, 5mm, and 10mm. Unlike Floor Blokker, AcoustiStep can be used under any thickness of LVT or LVP, plus ceramic and porcelain tie.
Installation Instructions:
- Start in the corner of the rooms and unroll the AcoustiStep flush along the wall
- For installation under glue-down hardwood or ceramic tile: adhere AcosutiStep to subfloor with a high-quality urethane adhesive
- Place sheets of AcoustiStepp edge-to-edge until desired area is covered, taping seams is optional, but not required
- Install baseboard 1/8″ off of floor and use acoustical sealant to prevent a flanking path
- Install AcoustiStep perpendicular to the finish floor
- Add desired flooring on top of the AcoustiStep per manufacturers instructions, letting the AcoustiStep fully adhere to the subfloor first
Crumbled rubber sound underlayments typically provide better improvement for improving the IIC rating for a floor at a lower price for the material. They’re also suitable for use under more finish floor types compared to Floor Blokker and other similar underlayments.
Benefits of Soundproofing a Floor with Sound Underlayment
Whether you need to use a sound underlayment in your home or in a construction project, your family or your tenants will thank you for soundproofing the floor. No one wants to hear every step their neighbors take above them, or be able to tell what TV show they’re watching or what song they’re listening to. At approximately $1-$2 per SF, soundproofing floors can increase the value of your home or property, and it won’t add too much time or cost to a construction project.