
Table of Contents
Soundproofing vs Acoustic Treatment for a Music Room
Most people start soundproofing a music room by covering the walls in foam or acoustic panels. The room then sounds better from the inside, and the neighbors hear almost exactly what they heard before.
That is because there are two different jobs here. Soundproofing stops sound getting out of the room, and it takes mass, airtight seals and separation between surfaces. Acoustic treatment controls echo inside the room so your playing and recordings sound clean. It takes soft, absorbent panels. Panels do nothing to stop sound leaving, and a sealed, heavy wall does nothing for echo. Most music rooms need some of both, and it pays to know which problem you are paying to fix.
Quick answer To soundproof a room for music, work in this order: seal every gap, fix the door, add mass to the shared walls, then decouple the walls and floor if you play drums or loud bass. Add acoustic panels last, for the sound inside the room.
How Much Soundproofing Does a Music Room Need?
An ordinary interior wall is rated around STC 33–35, which is enough to turn normal speech into a murmur. Music is far louder than speech, so the louder the instrument, the more of the steps below you need.
| What you play | Typical level near the source | What it takes |
|---|---|---|
| Vocals, acoustic guitar, keyboard through headphones | About 70–90 dB | Seal the gaps and fix the door |
| Acoustic piano, brass, woodwinds | About 85–100 dB | Seal, fix the door, add mass to shared walls |
| Amplified guitar and bass, full band | About 100–115 dB | All of the above, plus decoupled walls |
| Acoustic drum kit | About 100–120 dB | Room within a room with a floating floor, or an electronic kit |
Step 1: Seal the Gaps Around the Music Room
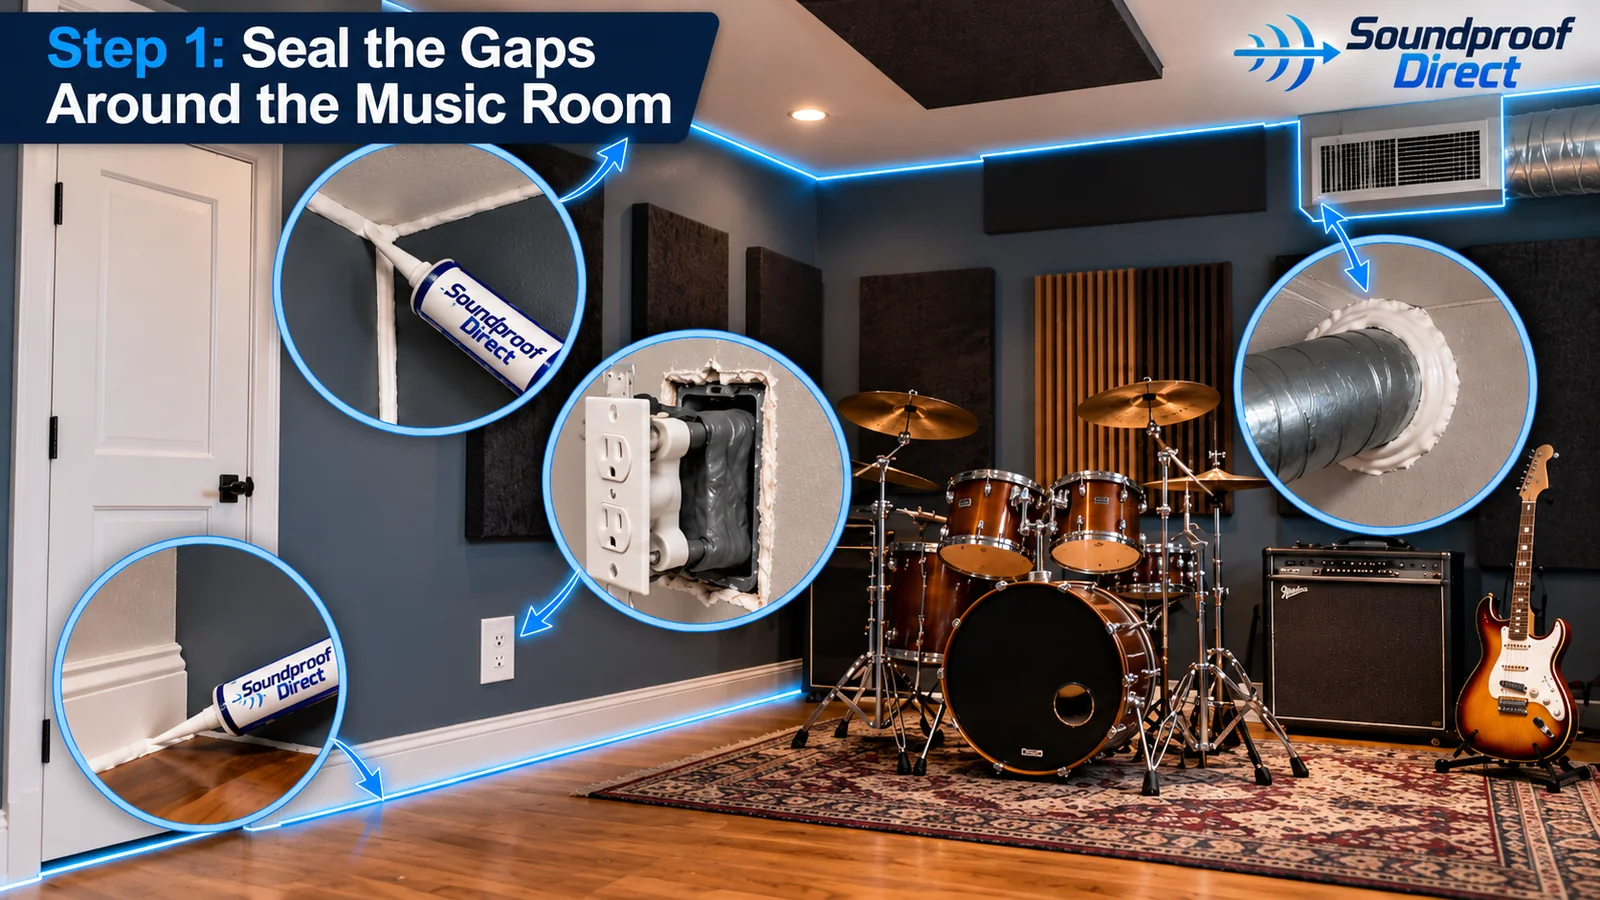
Sound goes through any path air can take. A small gap can undo most of what a well-built wall achieves, so sealing comes before anything you buy by the roll.
- Drywall edges. Run acoustical caulk along the joints where walls meet the floor, the ceiling and each other. It stays flexible, so the seal does not crack as the building moves. One 28 oz tube is $17.99.
- Outlets and switches. Electrical boxes are open holes in the wall. Back-to-back outlets on a shared wall are the worst. Wrap each box with an acoustic putty pad and caulk around the cover plate.
- Pipes, cables and vents. Caulk around every penetration. Air ducts carry sound straight to the next room, so a sealed room with an open supply duct still leaks.
A well-sealed room gets stuffy fast with a band in it. Plan how fresh air gets in (a lined duct with a bend in it, not a straight hole) before you seal everything else.
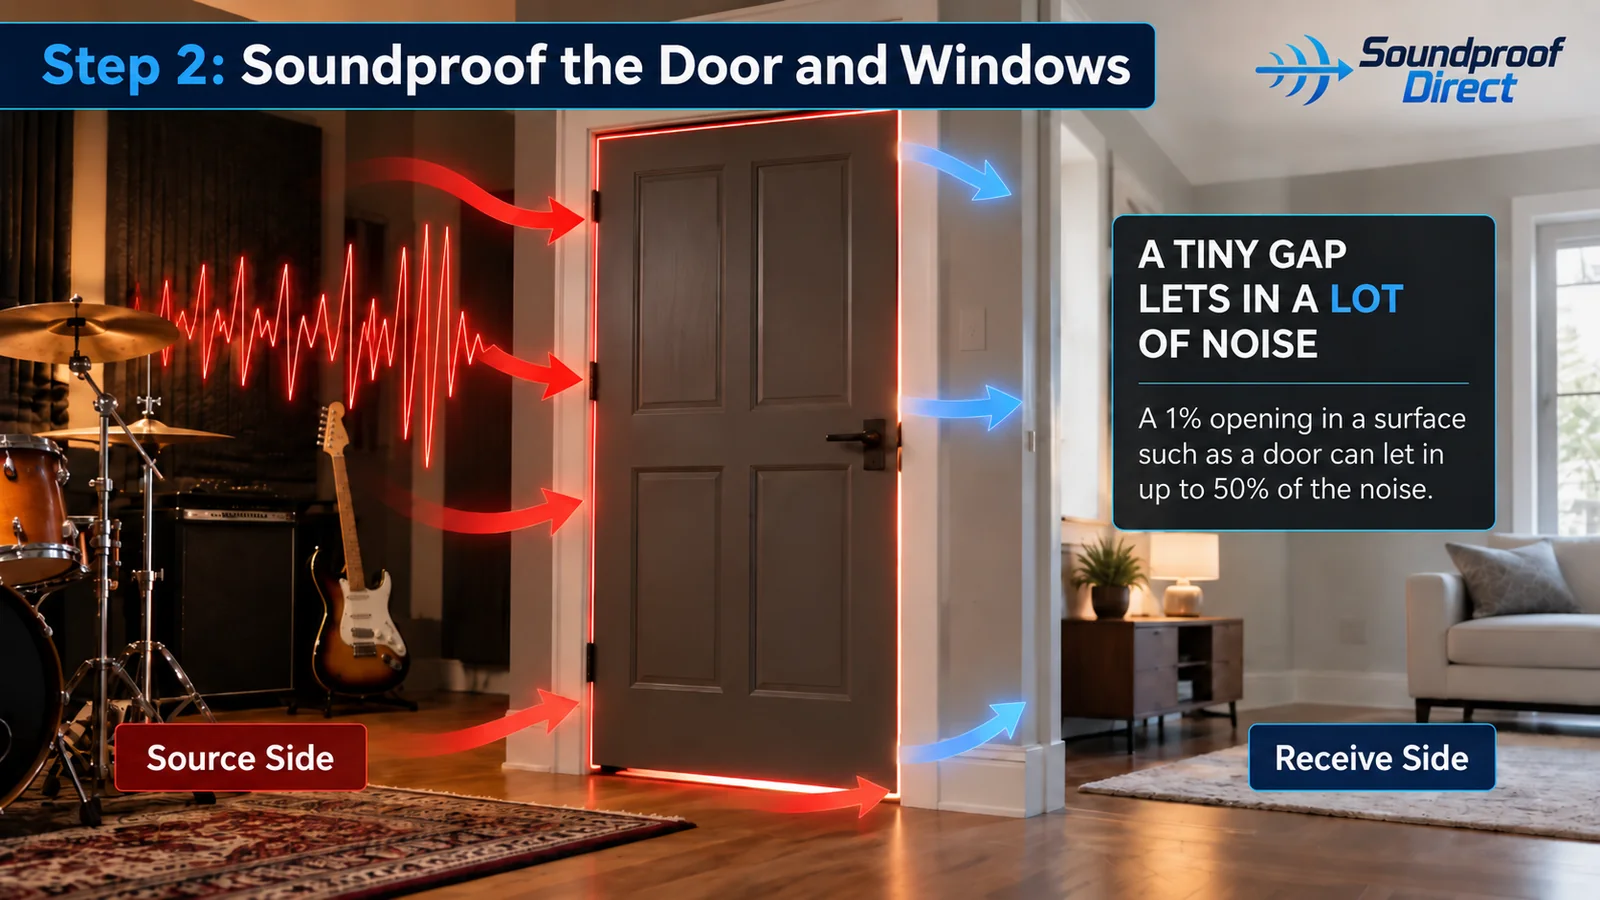
Step 2: Soundproof the Door and Windows
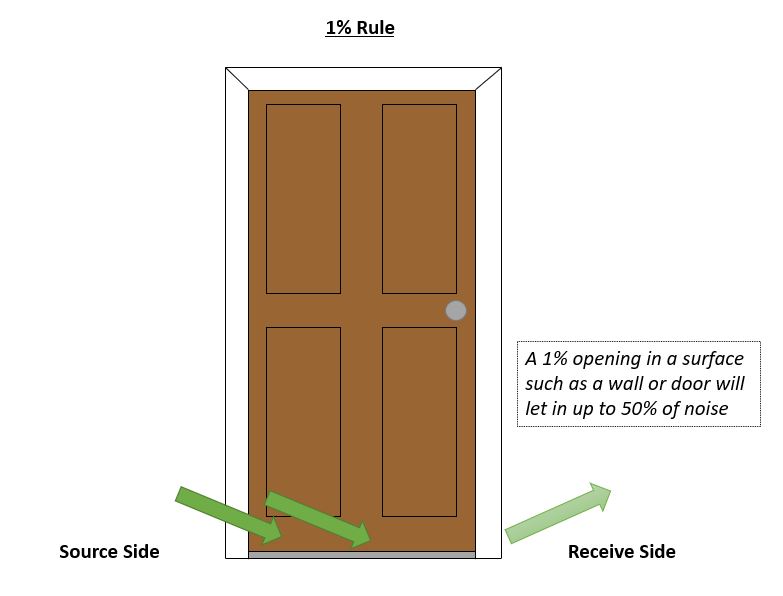
In most music rooms, the door is the weakest part of the room. A typical interior door is hollow, light and has a gap underneath you can slide a hand through.
- Swap a hollow-core door for a solid-core one. Same size, several times the mass.
- Seal the frame. A door perimeter seal closes the gap around the top and sides.
- Close the bottom. An automatic door sweep drops onto the threshold as the door shuts and lifts as it opens, so it seals without dragging on the floor.
- Windows. Glass is light and window frames leak. A heavy soundproof curtain made to the window size blocks sound rather than just softening echo, and comes down when you want daylight.
For drums or a full band, serious rooms use two doors with an air space between them. It is the same idea as a double wall.
Step 3: Add Mass to the Music Room Walls
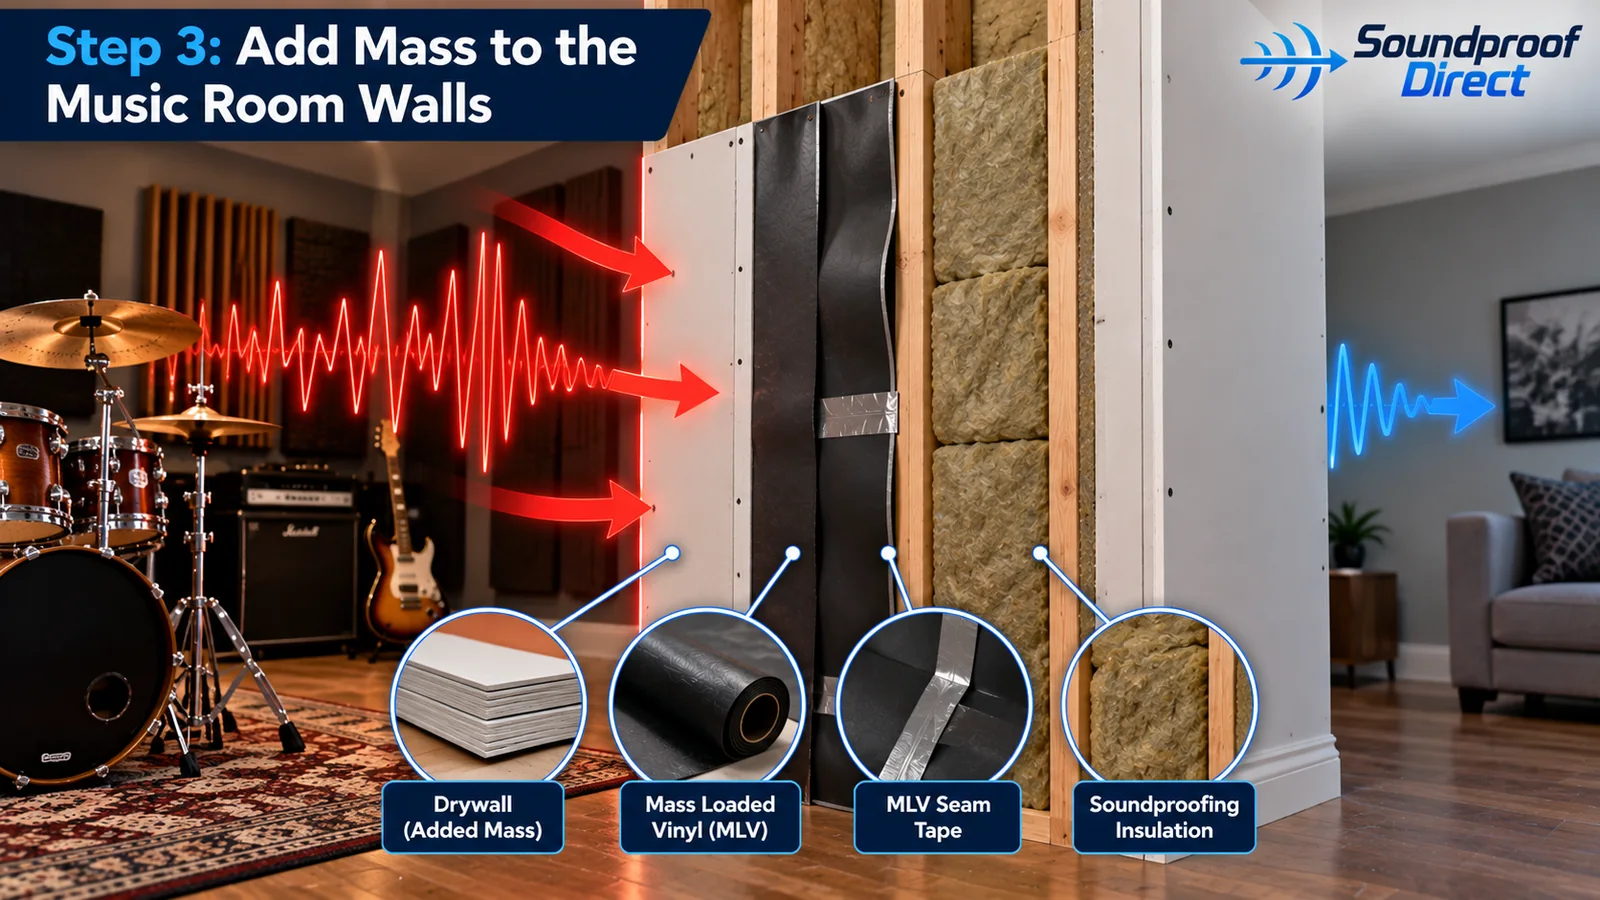
Heavy walls are harder for sound to shake. Doubling the mass of a wall adds roughly 5–6 dB of reduction, which is why thin partition walls pass so much music.
The usual ways to add mass are extra layers of drywall or a layer of mass loaded vinyl (MLV). A single 1/8″ layer of 1 lb/sf MLV adds 10 or more STC points to a stud wall, about the same gain as 3–4 layers of drywall, at a fraction of the thickness. Wall Blokker is the same idea tested in dozens of wall assemblies.
- In an open wall or new build, staple or screw the MLV to the studs, fill the cavity with dense soundproofing insulation, and put drywall over the top.
- On a finished wall, fix the MLV over the existing drywall and cover it with a new layer of drywall.
- Tape every seam with MLV seam tape and caulk the edges. A barrier with open seams is a barrier with gaps, which puts you back at step 1.
- Do the ceiling too if there is a room above. Sound goes up as easily as sideways.
Step 4: Decouple the Walls for Drums and Bass
Bass and kick drum are what neighbors hear through a wall that stops everything else. STC ratings only measure from 125 Hz up, while a bass guitar’s low E sits around 41 Hz and a kick drum’s thump is lower than 125 Hz too. Those long waves shake the whole wall, and whatever the drywall is screwed to carries the vibration to the other side.
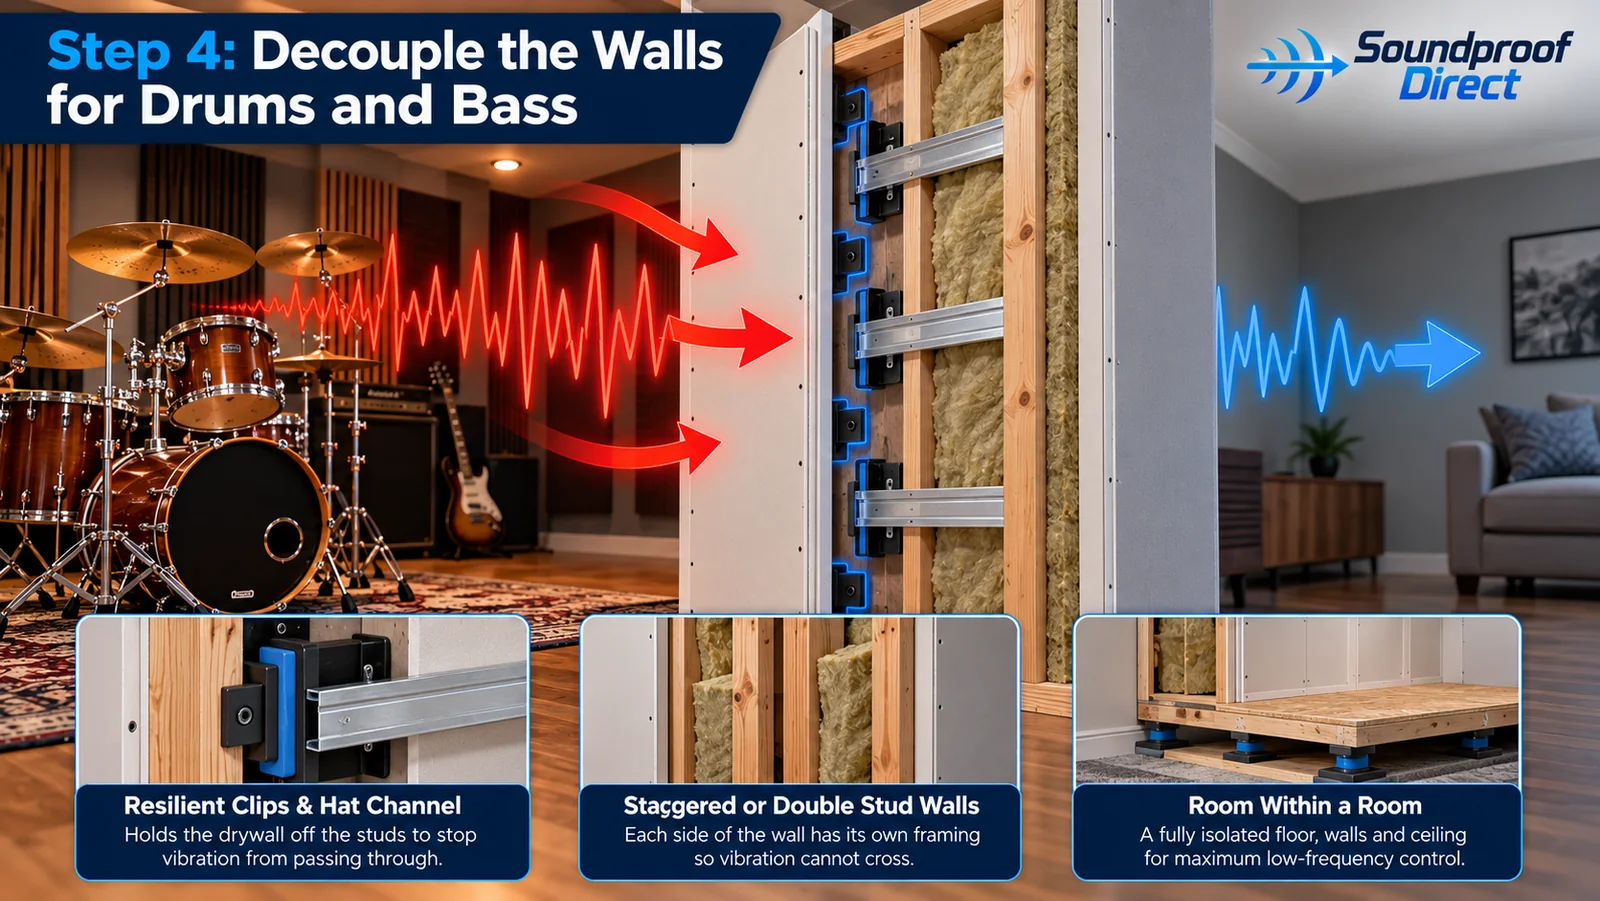
Decoupling breaks that path, so the inside face of the wall is not rigidly connected to the outside face:
- Resilient clips and hat channel hold the drywall off the studs. This is the most practical upgrade to an existing wall. One screw that goes through into a stud shorts the whole thing, so mark the studs.
- Staggered or double stud walls give each side of the wall its own framing. This is the choice for a new build.
- Room within a room. A floating floor, separate walls and a separate ceiling that never touch the building. It is the only approach that reliably contains an acoustic drum kit, and it is a construction project, not a weekend job.
Decoupling works together with mass and sealing, not instead of them. A decoupled wall with gaps around the outlets still leaks.
Soundproofing a Band or Drum Practice Room
A practice room has to hold the loudest sound a house ever makes, so the choice of room matters as much as the materials.
- Pick the right room. A basement on a concrete slab is best: no one below, and earth on the other side of some walls. Avoid rooms above or beside bedrooms.
- Get the drums off the floor. A drum riser built on a resilient rubber layer cuts the kick-drum thump that travels through the floor into the rest of the house.
- Get amps off the floor too. An amp sitting on the floor drives the floor. Put it on a stand and turn it toward the inside of the room, away from shared walls.
- Keep the kit away from shared walls. Distance helps, and the wall right behind a drummer takes the most energy.
- Turn the stage volume down. In-ear monitors, lower amp settings and an electronic kit for late practice all cut what you have to contain.
Sound Dampening Panels for a Music Room
Once the room is sealed, it will sound boomy and harsh inside, especially with drums. That is where acoustic treatment comes in. Sound dampening panels absorb the reflections that make a room ring. They make practice easier on your ears and recordings cleaner. They do not stop sound leaving the room.
- Absorption panels. Fabric-wrapped fiberglass panels (NRC 1.05) at the first reflection points on the side walls, behind the drummer and behind the speakers. Start with about 20–25% of the wall area and add more if the room still rings.
- Bass trapping. Low frequencies build up in corners. Panels set across a corner, or mounted with an air space behind them, absorb lower than the same panel flat on the wall.
- Ceiling. A few ceiling clouds over the drum kit or mix position stop the flutter between a hard floor and ceiling.
- Diffusers. Diffusers scatter reflections rather than absorbing them, so a larger room stays lively without echo. They are a later purchase, not a first one.
For the full range of options, see types of acoustic wall panels.
How to Soundproof a Room for Music Cheaply
Spend in order of what leaks most per dollar. The first three rows cost little and are often the whole difference for acoustic instruments.
| Fix | What it stops | Cost |
|---|---|---|
| Caulk gaps and pad the outlets | Leaks at edges and electrical boxes | $ — $17.99 a tube of caulk |
| Door seal and automatic sweep | The biggest leak in most rooms | $$ |
| Soundproof curtain on the window | Leaks through glass and frames | $$ |
| MLV on the shared walls | Mid and high frequencies through the wall | $$$ — about $800 of MLV for a 12×12 room, plus drywall |
| Resilient clips and a second layer of drywall | Bass and drums through the wall | $$$$, usually a contractor |
| Room within a room | A full band or drums at night | $$$$$, a construction project |
If you rent, you usually cannot open the walls. Focus on what comes out when you leave: a door sweep and seals (ask the landlord first), a soundproof curtain, rugs, amp stands and absorption panels hung on hooks. Then cut the source: headphones, practice amps and an electronic kit.
Where to Start Soundproofing Your Music Room
- Apartment or rented room: seal the door, curtain the window, treat the room, and turn the source down. Real soundproofing needs the walls.
- House, acoustic instruments or vocals: steps 1 and 2 first. Add MLV only on walls you share with bedrooms.
- House, amplified band: steps 1–3 on every wall, ceiling included, then decouple the walls that face the neighbors.
- Acoustic drums, or building from scratch: plan a room within a room from day one. It costs far less to build decoupled than to rebuild later.
Frequently Asked Questions
What is the best way to soundproof a room for music?
Seal every gap first, then fix the door with a solid core, perimeter seals and a sweep, then add mass such as mass loaded vinyl or extra drywall to the walls you share with others. For drums or loud bass, the walls and floor also need to be decoupled from the building. Acoustic panels come last and only improve how the room sounds inside.
Do acoustic panels soundproof a room?
No. Acoustic panels absorb echo inside the room, but sound passes through them and through the wall behind them. To stop sound leaving a music room you need mass, airtight seals and, for bass, decoupling. Panels are still worth adding once the room is sealed, because a sealed room sounds boomy.
How much does it cost to soundproof a music room?
It depends on the instrument. Sealing gaps and fixing the door costs a few hundred dollars and is often enough for vocals and acoustic instruments. Adding mass loaded vinyl to the walls of a 12×12 room is about $800 in material plus drywall. Decoupled walls and a full room within a room for drums are construction projects, usually priced by a contractor.
Can you soundproof a music room in an apartment?
Only partly. Without opening the walls you can seal the door, hang a soundproof curtain over the window and treat the room with panels and rugs. That helps with acoustic instruments and vocals. For drums or amplified music in an apartment, lowering the source with headphones, practice amps or an electronic kit does more than any removable product.
Does foam soundproof a room?
No. Acoustic foam, including egg crate foam, is light and open-celled, so sound passes straight through it. Foam absorbs echo inside the room, which is useful treatment, but it does not keep music in or noise out.