
Table of Contents
How to Soundproof an Existing Wall Without Removing Drywall
Most walls get soundproofed after the fact: a new neighbor, a nursery next to the TV room, a home office that shares a wall with the laundry. The wall is finished, painted and probably has outlets, trim and a door in it, and tearing it open is the last thing anyone wants to do.
You don’t have to. There are six ways to soundproof an existing wall, and four of them leave the drywall where it is. This guide ranks all six by how much they help, what they cost and how much room they take, so you can stop at the one that fixes your noise.
Quick answer To soundproof an existing wall without removing drywall, seal the gaps and outlets first, then add mass loaded vinyl over the wall and cover it with a new layer of drywall, caulked at the edges. That adds roughly 7–10 STC points and about 3/4″ of thickness. For more than that, you have to open the wall or build a new one in front of it.
Find Where the Sound Gets Through First
Before you add anything to the wall, make sure the wall is the problem. Sound takes the easiest path, and in a finished room that is often not through the drywall.
- Outlets and switches. Back-to-back outlet boxes in a shared wall are a hole straight through it. Put your ear next to one while the noise is on.
- The base of the wall. Drywall usually stops short of the floor and hides behind the baseboard. That gap runs the full length of the wall.
- The door. A hollow-core interior door with a gap under it leaks more than the wall around it. Fix the door first if the noisy room is next to it.
- The ceiling and floor. Sound can go up into a shared joist space or attic and come down on the other side of the wall. If the noise seems to come from above, treating the wall alone won’t fix it.
- Windows, on exterior walls. For traffic or street noise, the glass and the gaps around the frame are almost always weaker than the wall. Seal the frame, then add a window insert or heavy sealed window cover before you touch the wall.
For a shared interior wall, treat your own side. It’s the side you control, and adding to it works the same whichever side the noise starts on.
Ways to Soundproof Existing Walls, Ranked
STC (Sound Transmission Class) is how much a wall blocks; higher is better. A typical interior wall, 2×4 studs with 1/2″ drywall on both sides and empty cavities, rates around STC 33–34. At that level you can understand a normal conversation through it. Every 10 points sounds roughly half as loud on the other side.
| Upgrade | Typical STC gain | Adds to the wall | Opens the wall? | Materials cost |
|---|---|---|---|---|
| Seal outlets, gaps and the base | Restores what the wall should do | Nothing | No | $ |
| Blow insulation into empty cavities | About 3–5 | Nothing | Small holes only | $–$$ |
| Second layer of drywall with damping compound | About 5–8 | About 5/8″ | No | $$ |
| MLV over the wall plus new drywall | About 7–10 | About 3/4″ | No | $$ |
| Resilient channel plus new drywall | About 10–15, if installed right | About 1-1/8″ | No, but fussy | $$ |
| New stud wall in front, with an air gap | About 15–20 or more | 4″–6″ of floor space | No, but it’s a build | $$$ |
Seal Outlets, Gaps and the Base of the Wall
This is the cheapest upgrade on the list and the one that makes every other one work. A wall with leaks performs like the leaks, however much you add to it.
- Pull the baseboard and run a bead of acoustical caulk along the gap between the drywall and the floor. Do the same along the top where the wall meets the ceiling, then put the trim back.
- Seal every outlet and switch box. Turn off the power, take off the cover, and caulk the gap between the box and the drywall. Putty pads wrapped around the back of the box help more if you can reach it.
- Caulk any cracks at corners and around pipes, ducts and wall-mounted fixtures. Acoustical caulk stays flexible, so it doesn’t crack open again the way regular caulk does.
Add Insulation Without Opening the Wall
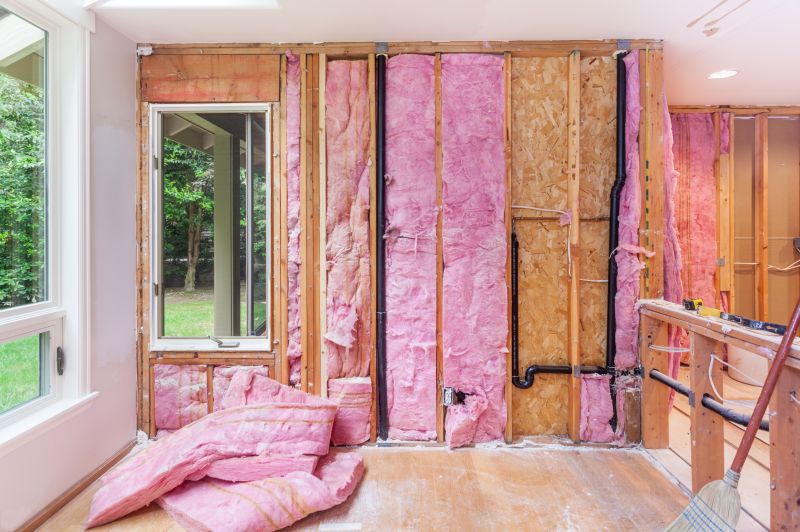
Many interior walls are empty inside. Insulation in the cavity soaks up sound bouncing between the two layers of drywall and adds a few STC points. You can have it blown or injected through small holes drilled near the top of each stud bay, which are then patched and painted. Check first: tap the wall or look in through an outlet box. On an exterior wall that is already insulated, this step does nothing.
Add Mass Loaded Vinyl and Drywall Over the Existing Wall
This is the best upgrade that leaves the existing drywall in place. Hang MLV over the wall, fastened through to the studs, tape the seams with MLV seam tape, then cover it with a new layer of drywall caulked at the floor, ceiling and corners. The limp vinyl adds mass and keeps the old and new drywall from acting as one stiff panel.
- Wall Blokker PRO (1.1 lb/sf, $299 per 100 sq ft) is the best choice here. Its fused scrim adds some decoupling back and gives 3–5 STC points more than standard MLV on the same wall.
- Wall Blokker (1 lb/sf, $219) is the standard choice, and Wall Blokker Lite ($169) is only 1/16″ thick when door jambs and trim are tight.
A 12′ × 8′ wall is 96 sq ft, so one 4′ × 25′ roll covers it. For the full step-by-step, fastener spacing and box extenders, see how to install mass loaded vinyl on top of an existing wall.
Add a Second Layer of Drywall
Screwing a second layer of 5/8″ drywall over the existing wall adds mass, and a viscoelastic damping compound between the two layers adds more by stopping them ringing together. It’s a familiar job for any drywaller and only adds 5/8″. It usually does a little less than MLV and drywall, because two rigid layers still behave much like one thick one, and the compound takes a couple of weeks to reach full effect. Caulk the edges of the new layer the same way.
Soundproof Drywall Panels: Are They Worth It?
Soundproof drywall panels are factory-laminated boards: two or more layers of gypsum with a damping layer built in. One panel does roughly what two layers of drywall with damping compound do, in less thickness. They cost several times as much as standard drywall, they’re heavy, and they’re harder to cut and patch. Over an existing wall, they make sense when every fraction of an inch matters. Otherwise MLV under a standard sheet of drywall gets you to the same place for less.
Soundproof Walls After Drywall Installation: Opening the Wall
If you need more than about 10 STC points, for a home theater, drums, or a bedroom next to a loud living room, adding layers runs out of steam. Two options remain:
- Take one side down to the studs. Fill the cavity with insulation, put Wall Blokker directly on the studs, then hang the new drywall on resilient channel or isolation clips. MLV on bare studs adds 6–12 STC points by itself, and the channel decouples the new drywall from the framing. It’s messy for a few days, but it doesn’t add thickness.
- Build a new wall in front of the old one. A separate stud wall with its own top and bottom plates, an air gap, insulation and drywall on one side. Nothing connects it to the old wall, so sound has to cross an air gap instead of a stud. It is the biggest gain on the list, at the cost of 4″–6″ of floor space.
Either way, the drywall must not touch the adjacent walls, floor or ceiling directly. Leave a 1/4″ gap and fill it with acoustical caulk. For a side-by-side of the materials, see the best soundproofing material for walls, ceilings and floors.
Which Upgrade Fits Your Noise
- Muffled voices or a TV from the next room: seal the gaps and outlets, then MLV and drywall if it’s still there.
- Clear conversation through the wall: the wall is probably empty. Insulation plus MLV and drywall.
- Bass, a subwoofer or drums: open the wall for MLV on the studs and resilient channel, or build a new wall in front. Layers alone won’t stop low frequencies.
- Traffic through an exterior wall: the windows first, then the wall.
- Neighbors in a condo or townhouse: treat your side and check the ceiling and floor paths too. See how to block noise from neighbors.
Frequently Asked Questions
Can you soundproof an existing wall without removing drywall?
Yes. Seal the gaps and outlets, blow insulation into empty cavities, then add mass loaded vinyl and a new layer of drywall over the existing wall. Together that can add well over 10 STC points without opening the wall.
What is the cheapest way to soundproof an existing wall?
Sealing it. Acoustical caulk along the base and top of the wall and around every outlet box costs a few tubes of caulk and fixes the leaks that undo every other upgrade.
Which side of the wall should I soundproof?
Your own side. Adding mass works the same whichever side the noise starts on, and it’s the side you can get to. If you can do both, the second side adds more.
How much does it cost to soundproof an existing wall?
About $170–$300 in vinyl for a 12′ × 8′ wall, plus drywall, caulk and seam tape, for MLV and drywall over the existing wall. Sealing alone costs much less; a new stud wall in front costs more.
Do soundproof drywall panels work?
Yes. They are laminated boards with a damping layer, and one performs roughly like two layers of drywall with damping compound. They cost several times more than standard drywall, so MLV under a regular sheet is usually the better value.